There are plenty of resources on the web for VMware Virtual Disk expansion. Some of them offer detailed steps and very helpful. I am sharing with you the steps I followed. As always back up your entire machine before attempting this. This is applicable only for your non-production environment.
How many times do you end up creating a test lab and you finally figure that you are running low on virtual hard disk space because you started loading all possible applications for testing? Since, it is a test lab, you probably figured that I had one single virtual disk that hosts application and OS files. So, any standard hard disk expansion methods would naturally fail because of active OS files.
Environment:
Virtual Machine OS – Windows Server 2008 x64 Trial Edition
Host OS – Windows 7 x64 bit
Virtualization Technology: VMware Server 2 (yes, it is free). As of writing this blog, MS Virtual PC does not run on x64 bit.
Files Required: Windows Server 2008 x64 DVD and GParted Live ISO file/CD.
Open up VMware Infrastructure Web Access and login with the host machine administrator credentials
On the Inventory pane, select the machine that needs virtual disk expansion.
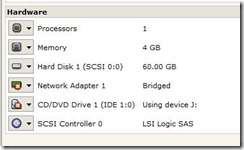
In the Hardware section, select the hard drive and click on the dropdown option to select “Edit”.
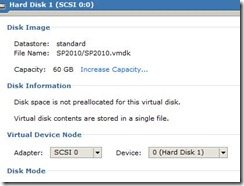
In the window that loads, select “Increase Capacity”
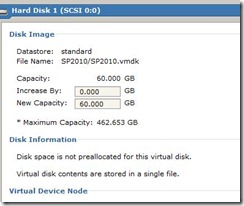
In the Hard disk properties window, type in the additional hard disk capacity needed in the “Increase By:” text box
You are done with increasing the hard disk space. It is that easy, but if you login into your Virtual machine and review Disk management, you will see this new disk space showing up as unallocated disk and you will have options only to assign a new drive letter since the primary disk hosts the OS files and there is no easy way to expand the OS disk (which is really why you are following all the above steps). If you had logged into your VM, it is time to shut down the machine.
Okay, now you need to download GParted LiveCD. I used the gpparted-livecd-0.3.4.-11 version.
Once you download the iso file, you can use MagicISO to mount the iso file and boot the VM from that drive. You can always add another CD/DVD hardware and mount the iso file to it and boot from the newly added drive.
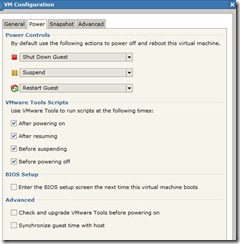
If you don’t have the VM to boot from CD, it becomes a pain to try to hit the function keys to get into the BIOS. VMware Server 2 has an easy option to load the BIOS on startup. Navigate to the “Commands” pane on the “Summary” tab and select “Configure VM”. Select the “Power” tab and under “BIOS Setup”, check the “Enter the BIOS setup” option
Once you boot from the CD, GParted configuration option loads. The directions are fairly straightforward. If you search, you will find tons of resources do it. You can always to the GParted home page and review the documentation
http://gparted.sourceforge.net/documentation.php
Assuming, that you were successful to expand your primary hard disk, you will assume that everything is done and you will start up your VM. Yes, you will be greeted with windows OS error messages. Okay, now load up your windows 2008 server CD and reboot the machine. Hit any key on start up, to boot from the CD/DVD. Once the windows setup loads, select “Next” to language settings and select Recover windows option.
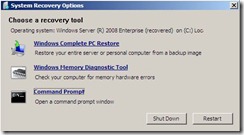
On the System Recovery Options window, select “Command Prompt”
In the command prompt, type in “cd recovery” and hit enter
In the recovery folder, type in “StartRep.exe” command
Let the process complete successfully, and you can restart the machine. You now have a VM machine with the expanded virtual disk.
